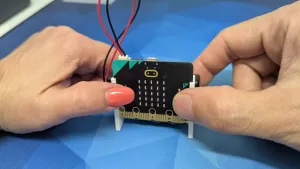
For this year’s EduTech booth, I brought along a selection of MicroBit projects that demonstrated what could be done with the devices. I love my MicroBits and am always amazed at what you can teach with them, in such a small and compact form factor. In these resources, I’ve documented a variety of different ways to use the MicroBit, from just the ‘bare-bones’ of the device itself, to some more elaborate setups that use some extra MicroBit compatible hardware.
I’ve compiled each of the projects in action into a short video, with more detailed explanations and code samples below. These are just starter ideas, and I’d love to see where your students might take them!
Virtual Pet
Components required
– MicroBit and Battery Pack
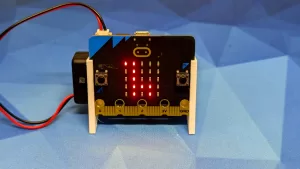
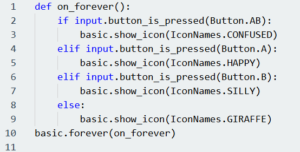
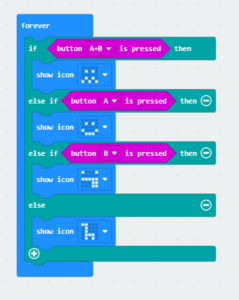
Inspired by the Tamagotchi craze in the 90’s, this is a simple activity whereby students create a ‘virtual pet’ that responds to different inputs. For this implementation, we have Georgina the Giraffe as the default image. To feed her, press Button ‘A’ which will display a happy face. She also likes to play so if you press Button ‘B’ she will poke her tongue out. If you try to feed her and play with her at the same time (by pressing A+B) then she will get confused.
I’ve included both block-based programming and text-based programming to best suit the student you might be working with.
Dodgy Digital Dice
Components required
– MicroBit and Battery Pack
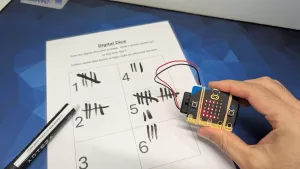
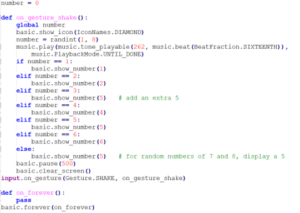
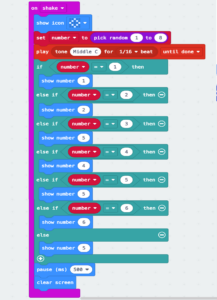
The digital dice project is a common one to do with students, but for this example I shamelessly stole the idea from Kristine Kopelke. Just like the standard project, the student can ‘shake’ the microbit to simulate rolling a typical 6-sided dice. In this example however, I have secretly programmed the dice not to be fair. If you inspect the code carefully, you can see a few ‘anomalies’
a) If the random number generated is a ‘3’, it displays a ‘5’
b) Instead of a random number between 1 and 6, it generates one between 1 and 8. If a ‘7’ or ‘8’ is rolled, then it also displays a ‘5’
We get the students to repeatedly roll the dice and record the outcome. Over many rolls, they start to see that while a ‘fair’ dice should result in an equal distribution of numbers, this dice is heavily biased towards the number ‘5’ and in fact you will never see the number ‘3’. This turns into a great activity around collecting data, analysing the outcome and hypotestising around what might be going on.
Sample code in both blocks and text
Quick Draw McGraw
Components required
– MicroBit and Battery Pack
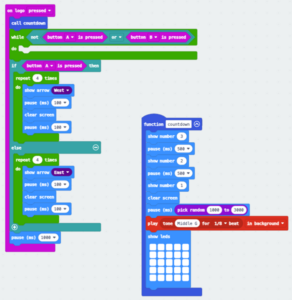
This project adds a layer of ‘gamification’ to help increase engagement. You need 2 players, one getting ready to press Button A and one getting ready to press Button B. Pressing the MicroBit Logo at the top starts the round. The MicroBit will countdown from 3, and will then pause for a random amount of time between 1 and 3 seconds. After that time, it will beep and flash the entire 25 LED display. Players need to be the first to press their respective buttons to win. The MicroBit will flash an arrow towards either the East or West depending on who was faster.
Colourful lights
Components required
– MicroBit and Battery Pack
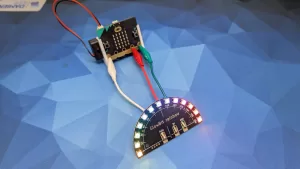
– Neopixel strip (this example uses a 13 Neopixel GlowBit Rainbow)
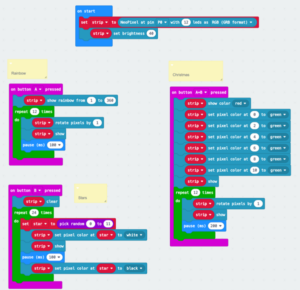
Connect the neopixel strip to pins P0 (data), 3V and GND. This program will initialise the strip as having 12 pixels (feel free to change to suit your setup) as well as dropping the brightness. I find that at 100% it is way too bright, and will likely drain your batteries a little faster. The example code then creates 3 different animations that are run for different button presses.
A Button – A rainbow effect where all the pixels are assigned a colour. The colours are then rotated to the next pixel every 100ms and repeated 12 times
B Button – Twinkling stars. A random light is chosen (note that the first pixel in a Neopixels chain is referenced by 0) and lit up as white. It waits for 100ms, turns off and the process is then repeated.
A+B Buttons – Christmas effect. The whole strip is assigned as Red, and then every 2nd pixel is changed to green. Note that we don’t see the final configuration until the ‘Show’ command is called. The colours are then rotated every 200ms
Industrial arm
Components required
– MicroBit and Battery Pack
– Kitronik Simple Servo pack
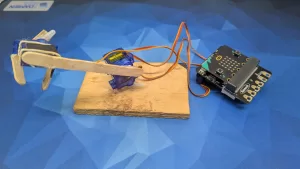
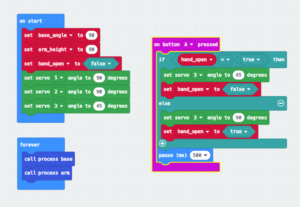
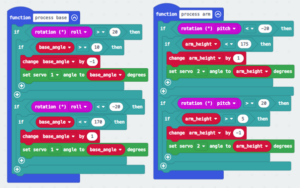
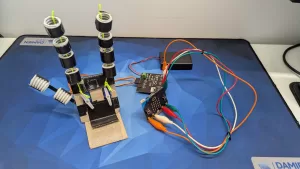
While the MicroBit can safely drive a Servo motor directly from one of its output pins, it would struggle to do the 3 servos necessary for this project. The Kitronic backpack is a great way to easily incorporate 3 servos into a Microbit project. The arm itself is constructed from scrap wood, paddlepop sticks and hot glue. This was intentionally done as cheap as possible, and with readily available materials, to show students it doesn’t need to be ‘perfect’. To operate this project, the arm takes advantage of the inbuilt accelerometer of the MicroBit. Tilting left and right will swing the arm from side to side. Tilting forward and backwards will lift and lower the arm and pressing Button ‘A’ will open and close the gripper
Bionic Hand
Components required
– MicroBit and Battery Pack
– Monk Makes Servo board
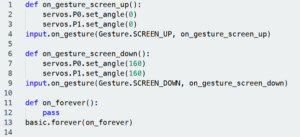
Similar to the Industrial arm, this project uses an additional servo board to be able to drive multiple servos. The hand itself is built with cardboard, cable ties and other readily available supplies from the local hardware store. The fingers work by means of a string that runs up the inside of the piping. As the servo motor turns, it pulls the string down, causing the fingers to curve inwards. The servo motors are controlled by tilting the microbit upside down. This taps into the ideas of Accessibility, where students can start to imagine how they could build prosthetic devices to help those in need.


