
This article first appeared in BrickJournal Issue 31, 2014
Using Sensors
When using just the Move Steering blocks, we are always directing the robot to do a specific set of movements. This is often called ‘dead-reckoning’. The problem with dead reckoning is that, should anything get in the way of the robot, it has no ability to realize this and will blindly continue to follow its given instructions, regardless of what is happening in the real world.
Sensors give our robot the opportunity to measure what is happening in the outside world, in real time, and then (programming permitting) use that information to make informed decisions about its actions.
The Sensors
There are quite a few sensors that are included as part of either EV3 system.
Home Edition (31313)
- Touch
- IR Seeker
- Colour
Education Edition(45544)
- Touch
- Colour
- Ultrasonic
- Gyro
In addition to this, there are huge range of 3rd party sensors that can be used with the EV3 system including accelerometers, force sensors, temperature probes etc.
For this article, I’ll concentrate on the Colour sensor, as it is common to both versions of the kit.
Colour Sensor.
The Colour sensor can be used in three different ways
Colour Mode – Measure and report a specific colour, Black, White, Green, Blue, Red Yellow and Brown. These have to be pretty close to the official LEGO colours for it to work most reliably.
Reflective Mode – Rather than just giving a set colour, this mode gives a reading ranging from 0 to 100, based on the amount of light that is reflected back into the sensor. Lighter, shinier colours will reflect more light where as darker colours will absorb more light. This is particularly useful when you know you’ll encounter colours that are not the ‘standard’ LEGO colours
Ambient Mode – This mode will measure the ambient Light that the sensor can see. If it’s in a dark room or you cover the sensor over, you’ll get a low value, if it is in a bright room or pointing at a light source, you’ll get a high value.
We will stick with the Colour Mode for this article.
The TASK!
Your first challenge is to make the robot drive along the floor until it encounters a red strip of paper.
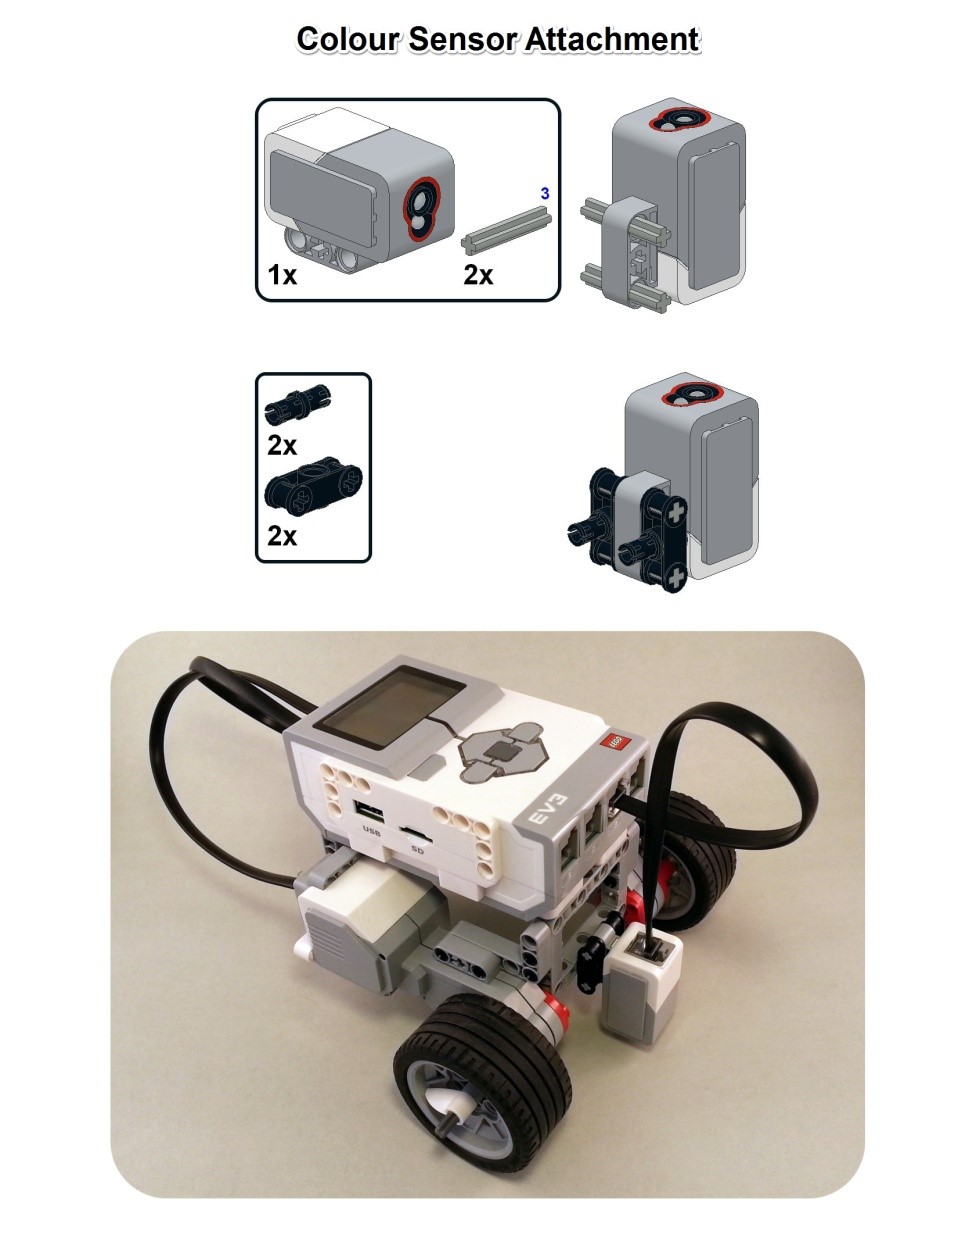
Firstly we’ll need to add a Colour Sensor to our robot.
Here is a quick attachment that can be used with the RileyRover or the RetailRover. If you have your own design, find a way to attach the Colour Sensor to the front of the robot, so that it is pointing down and is approximately 5mm from the ground.
Just the mere presence of the Colour Sensor does not mean the robot knows how to use it. It is up to us as programmers to give it the appropriate instructions.
The PLAN
There are many ways of achieving this task, but let’s start with one of the more basic approaches. Ideally we want the robot to go through the following set of instructions.
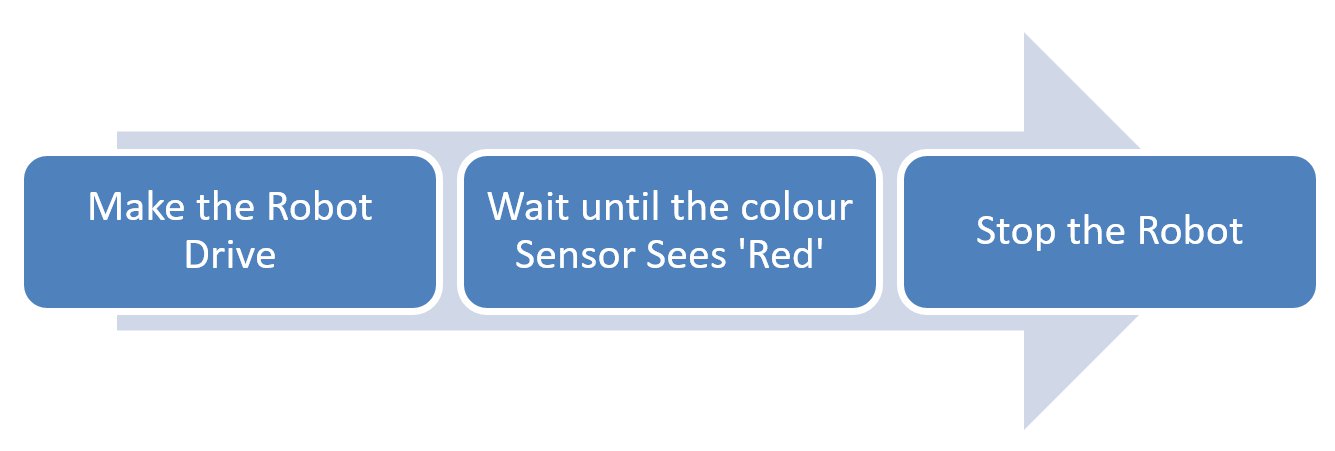
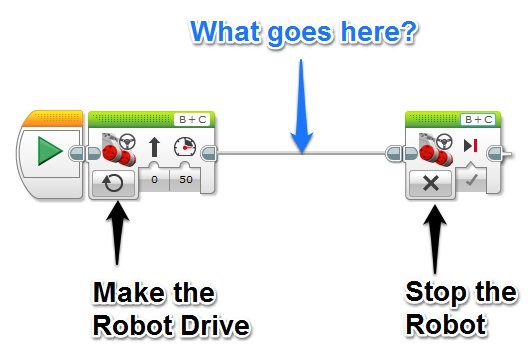
So the ‘Make the Robot Drive’ and ‘Stop the Robot’ can both be achieved with the Move Steering Block that we learnt about previously, but how do we do the ‘Wait until the Colour Sensor Sees “Red” ‘?
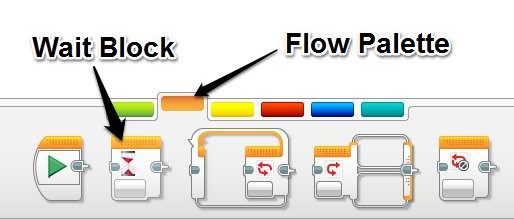
The WAIT Block
The Wait block can be found in the Flow palette of blocks and is a great way of telling the program to ‘wait’ at a particular instruction, until a certain condition has been met.
This condition might be ‘wait for 3 seconds before moving to the next instruction’, ‘wait for the Touch Sensor to be bumped before moving to the next instruction’ or in our case, ‘wait until the colour Red is detected before moving to the next instruction’
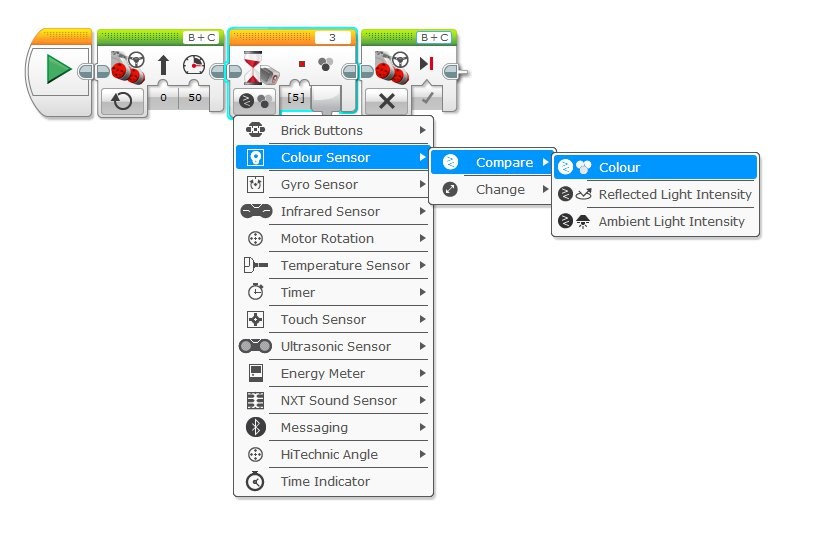
Select the ‘Colour Sensor -> Compare -> Colour’ Mode. Double check that the Port on Wait Block matches the Port on your Robot (I have my Colour Sensor connected to Port 3)
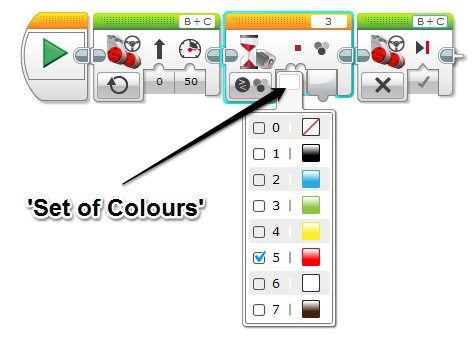
Click on the ‘Set of Colours’ input to change which colour the sensor is looking for, if necessary.
Now test it! Place your robot down on a surface that isn’t Red, and drive it towards a strip of red paper. Try and match your red paper to the official red LEGO pieces if possible. If all goes to plan, the robot should stop when it reaches the red paper.
What next?
Here are your next challenges, good luck!
- Make the robot stop when it sees either Red OR Blue
- Make the robot stop, make some noises and then turn around when it sees Yellow
- Make the robot stop when it gets to the edge of a table! (Hint: When the Colour Sensor is over the edge of the table, it will give you a reading of ‘No Colour’
Dr Damien Kee has been working with robotics in education for over 10 years, teaching thousands of Students and hundreds of Teachers from all over the world. He is the author of the popular “Classroom Activities for the Busy Teacher” series of robotics teacher resource books.
You can find more information at www.damienkee.com or contact him directly at damien@damienkee.com